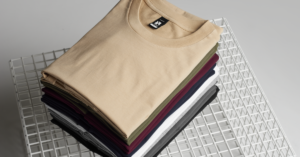
- The first thing you need is a printing screen, bottles of printing ink (in whatever colours you fancy) and a printing block.
- Before you do anything else, begin by creating a stencil outline of the desired image you wish to create. This can be achieved by various methods, although the most widely used and recommended technique is designing/drawing the image on a computer.
- Print it out onto translucent plastic or paper, and then create a stencil using emulsion (you can also create a more simplified stencil using standard plain paper if this option is more preferable).
- Once your T shirt printing stencil is complete, ensure that it is affixed (or emulsified, depending on how you decided to create your stencil) onto your printing sheet.
STAGE 2
- When your printing sheet is ready, place it onto the T-shirt, ensuring it is centred correctly so that the image lies in the precise location you want it to be – also ensure it is sturdy and secure (you don’t want it wobbling around during the next crucial phase).
- Pour the printing ink onto the screen slowly, starting with the top edge (as this is where you will begin creating strokes with your printing block).
- With wide sweeps, move the printing block from the top edge of the screen across to the bottom.
- This motion should be repeated two or three times across the whole screen. Remember – you only get one chance to get this right, otherwise, you’ll end up with a blurred image on your shirt.
The Final Step
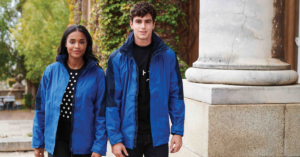
Once you’re confident, the ink has transferred across onto the T-shirt, carefully remove the printing sheet and admire your brand new design. From funky hen night T-shirts to corporate promotional clothing – the possibilities are endless.
The Other Option
As good as printing garments at home sounds, it can look like a bit of a drag. That is why Garment Printing is here to help. We offer a Price Beat Promise to ensure you get the cheapest printed garments available, and we also have an Express Delivery Service so you can get your garments quickly. Feel free to look at our case studies and see how we have helped thousands of companies over our 20-year career. Our dedicated team is available to help 15 minutes from when you fill out a quote.
Practice Makes Perfect
The printing of T-shirts is fast becoming ever more popular, but for the uninitiated wanting to create their own piece of personalised clothing, where do you start? The process of printing a specific image onto clothing is known as Screen Printing. Before starting your own personalised t shirts and personalised clothing business or creating one or two items of clothing for your own personal enjoyment, it is well-worth practising the art first. Here’s how it’s done:
STAGE 1
- The first thing you need is a printing screen, bottles of printing ink (in whatever colours you fancy) and a printing block.
- Before you do anything else, begin by creating a stencil outline of the desired image you wish to create. This can be achieved by various methods, although the most widely used and recommended technique is designing/drawing the image on a computer.
- Print it out onto translucent plastic or paper, and then create a stencil using emulsion (you can also create a more simplified stencil using standard plain paper if this option is more preferable).
- Once your T-shirt printing stencil is complete, ensure that it is affixed (or emulsified, depending on how you decided to create your stencil) onto your printing sheet.
STAGE 2
- When your printing sheet is ready, place it onto the T-shirt, ensuring it is centred correctly so that the image lies in the precise location you want it to be – also ensure it is sturdy and secure (you don’t want it wobbling around during the next crucial phase).
- Pour the printing ink onto the screen slowly, starting with the top edge (as this is where you will begin creating strokes with your printing block).
- With wide sweeps, move the printing block from the top edge of the screen across to the bottom.
- This motion should be repeated two or three times across the whole screen. Remember – you only get one chance to get this right, otherwise, you’ll end up with a blurred image on your shirt.
The Final Step
Once you’re confident, the ink has transferred across onto the T-shirt, carefully remove the printing sheet and admire your brand new design. From funky hen night T-shirts to corporate promotional clothing – the possibilities are endless.
The Other Option
As good as printing garments at home sounds, it can look like a bit of a drag. That is why Garment Printing is here to help. We offer a Price Beat Promise to ensure you get the cheapest printed garments available, and we also have an Express Delivery Service so you can get your garments quickly. Feel free to look at our case studies and see how we have helped thousands of companies over our 20-year career. Our dedicated team is available to help 15 minutes from when you fill out a quote.