In this article, I’m going to provide you a guide on how you can create realistic, photo-esque mock-ups using Adobe Photoshop. This way you can prepare a T shirt template and use it whenever you want to see how your designs will look once the T Shirt is printed.
Using Photoshop is a brilliant way of creating visuals which you can then take to a print shop and show them how you want them to look, or if you’re selling personalised t shirts online and you want to provide a preview that you’re customers can see to know if this is the T-Shirt that you want to buy.
Having said that, let’s dive straight in.
In order to create the mock-up, we’re going to be taking advantage of Photoshop’s Displacement Map. This feature is excellent as it allows you to distort your artwork so that it blends into the T-Shirt image that you have. This technique isn’t only useful for T-Shirt mock-ups and you can use it for any background that you would like. For example, you can create graffiti artwork on a brick wall, or you can use the same technique to create an entire range of custom clothing.
The beauty of this effect is that it merges your artwork into the background layer so it creates a beautiful, custom look.
LET’S START:
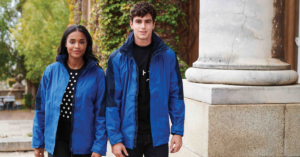
The first thing to do is to get a good image of a T-Shirt, either by taking your own photo or by doing a Google search for ‘blank T-Shirt’ and choosing the one that you like the most.
Once you have loaded the image of the T-Shirt in Photoshop, you’ll then need to start defining the Displacement Map. The Displacement Map is what will determine how the artwork file will be distorted and how it will bend around the creases of the T-Shirt to give it a realistic look.
To create the Displacement Map, you will need to go to the Channels panel which is on the right of the image. Once here, you now need to look for the Channel in which the shadows stand out the most. In our selected image, the blue channel gave us the best results.
You need to make sure that you can only see the channel that you are interested in (as mentioned, in our case it´s the Blue channel) and then you need to right click on this and then select “duplicate channel”. In the window that appears you need to select Destination > new, and you can rename the channel. I have chosen to call this channel “Displacement Map”, but you can name it as you wish.
Once you have saved, your new Displacement Map will open in a new window.
To make your design a part of the T-Shirt and allow the textures of the T-Shirt to show through better, we will need to soften the Displacement Map and you can do this by clicking Filter > Blur > Gaussian Blur. Do not use a very high blur radius otherwise the details in your artwork will be too distorted and they’ll become lost.
When you think that it’s ready, you can save the Displacement Map in a location that you prefer and close it. Once the Displacement Map is closed, you can now return to the main file of the T-Shirt and make all of the RGB channels visible again and then go back to the layers panel.
Now you can drag your design onto the T-Shirt file that you have open.
Now you want to use your Displacement Map to make the design look like it’s actually part of the T-Shirt. In order to do this, click on filter > distort > displace.
In the pop-up window that appears, you can define the off-set value. We recommend choosing parameters between 5 and 10 and then leaving the rest of the options as default.
Remember that the greater the value that you choose, the more drastic the distortion will be.
To give the T-Shirt some final touches, and create more of a feeling that the design and the fabric is completely integrated, we recommend using the following:
- Select the layer and double click on it and you will see a Layer Style window pop up.
- In the lower part of the menu you will see a menu called “blend if” and you will find two sliders. Hold down the ‘alt’ key and slide the bottom slider from the left and you will notice that the fabric of the T-Shirt will now start to show through your design.
With the last adjustment you can the shadows to blend through the artwork and make it look like it’s actually part of the T-Shirt.
You can also modify the opacity of the artwork layer by clicking on the drop down menu directly underneath the “Layers” heading on the right of the image. You can then scroll through the different options in the drop down and find one which gives you the desired result.
And voilá!
Here is your fantastic, realistic preview that you’ve made with Photoshop. The design should now look like it’s actually part of the personalised T-Shirt and it’s ready for you to show off or upload onto your website.
If you still have any doubts, don’t worry. Our printing experts can give you a hand and we have the graphic design services which can help you to design your t shirt printing and personalised clothing project.